Pages

Thursday, March 31, 2011

Lili of the Valley Thursday SPRING challenge

Hello everyone, I am so glad this very, very busy week is coming to a close. It seems like there is  no time for anything except work, chores and errands! I really could use a good vacation, better yet- a stamp-cation. Stay home lounging around in PJ's, doing a lot of stamping, coloring, playing games...
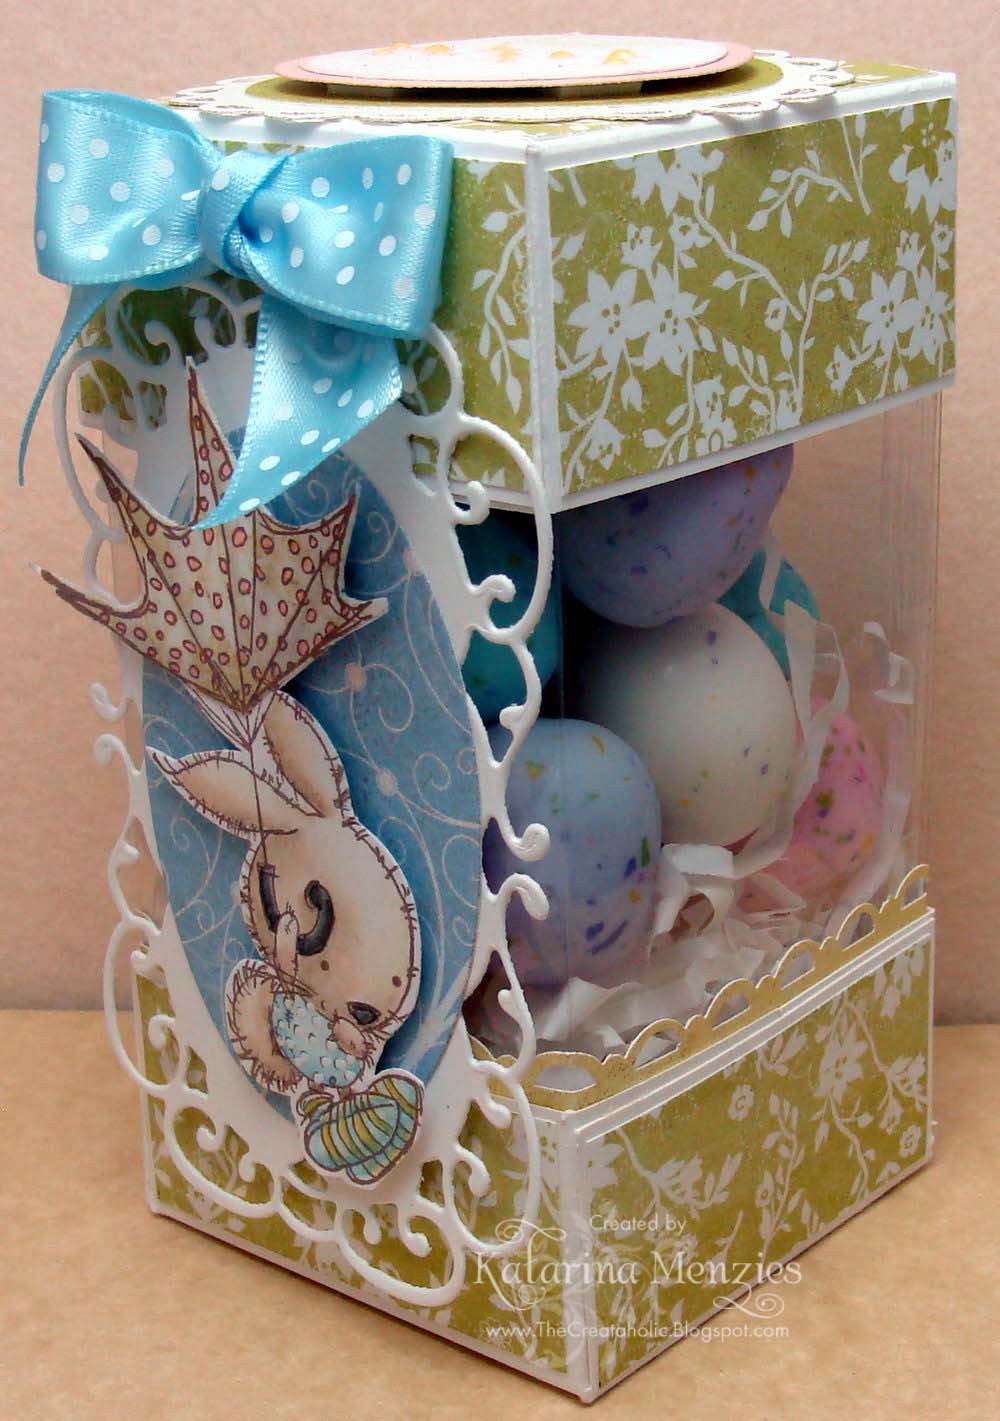
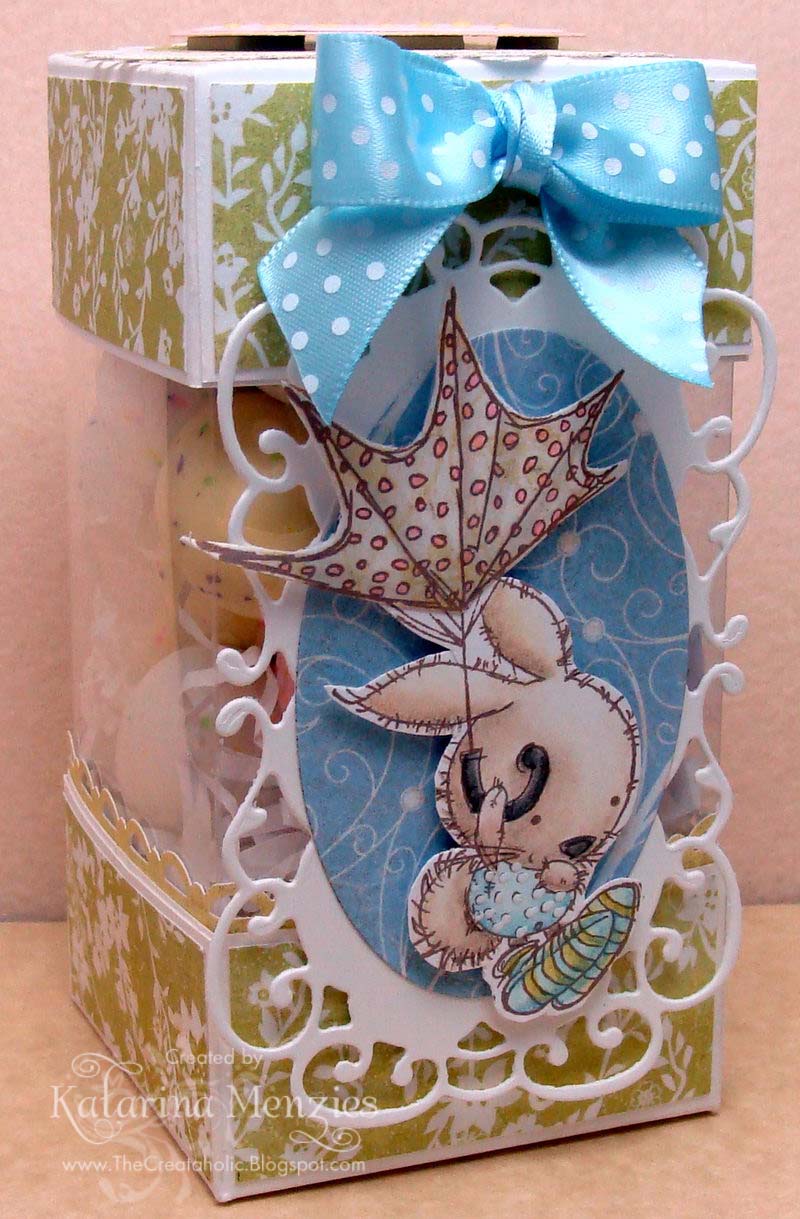
OK, I'll stop dreaming now. Here's my Spring themed card for the LOTV challenge this week. I chose this adorable little birdie on a watering can image. Too tweet! Lol!


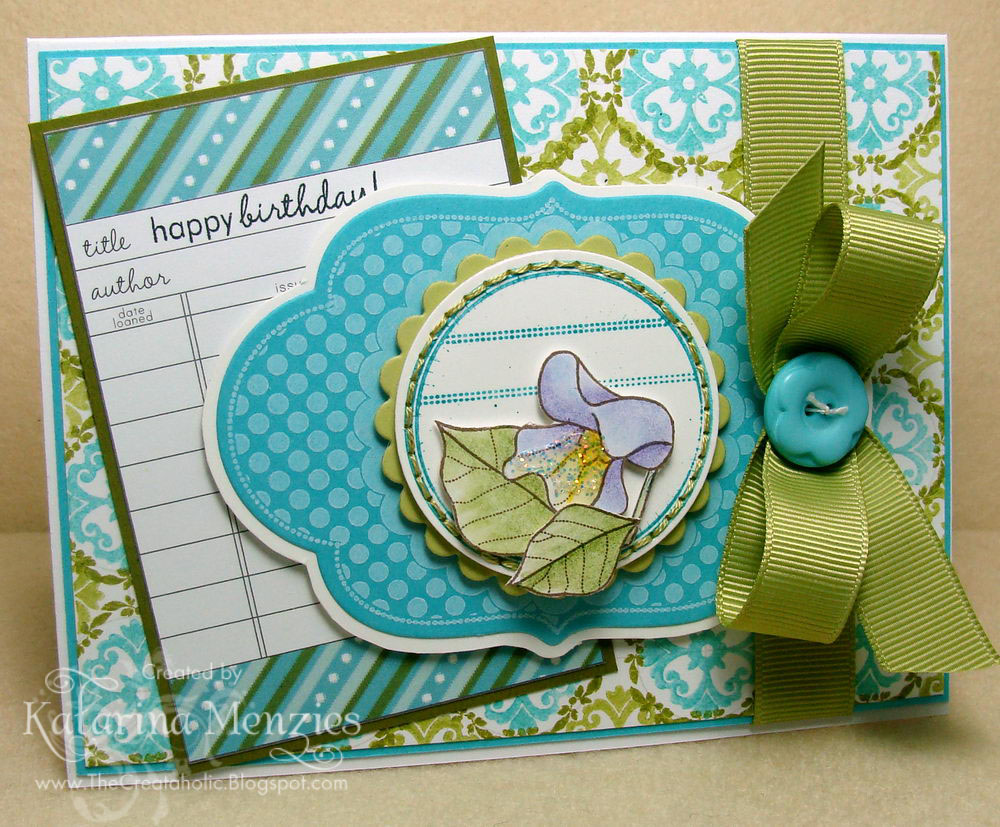
I colored the chubby birdie with my colored pencils because I knew I wanted lush green grass, and I do grass best with my colored pencils. Can't seem to get the same look with anything else.
I even added a bit of hand stitching with some pretty Spring Green embroidery floss around the lacy square.

Even the patterned paper is appropriately named 'Sparkling Spring'- a new collection from Prima. And last but not least, I die cut some felt flowers with PTI dies.

Now if only the weather around here started looking something like this card...

That's all for today, make sure you check out the Lili of the Valley challenge blog for some DT inspiration, create your own card to enter for a chance to win some stamps!!

Thanks for visiting!

Stamps: Lili of the Valley
Ink: Memento
Paper: Prima, PTI, Memory Box, Heavenly White
Tools & Accessories: Spellbinders lacy squares, PTI flower dies, pearls, DMC floss, colored pencils, OMS, Stickles, PTI ribbon

Sunday, March 27, 2011

Vintage Silhouettes

Good morning everyone! I hope you all are having a relaxing weekend so far. 

Lately, I find myself being drawn to silhouette stamps, especially vintage images. I don't think I've ever given them a second look before. Isn't is strange how our tastes change slowly over time? When I look back to when I first started making card, sometimes I ask myself, 'What was I thinking'?! lol. Now, when I see a silhouette stamp I have to display some sort of self control, I don't want to over do it.

Anyway, onto my card...

These darling images are from Rubber Stamp Shack. After I brayered a piece of paper with some pretty pastels, I stamped them in Versafine Black. When I know I MUST have a crisp, clear image, I always use the Versafine. It never fails me!


Hope you like it, thanks for peeking in today!

Stamps: Rubber Stamp Shack, Lili of the Valley circle sentiment
Ink: Versafine, Adirondack, Distress
Paper: Heavenly White, PTI, Prima
Tools & Accessories: Nestabilities, Lacy Circles, PTI ribbon, PTI flower/scallop dies, seed beads, sewing machine

Friday, March 25, 2011

March Papertrey Blog Hop

Hello everyone, I'm here again to join in on the PTI blog hop. It's been a long time since I played along and I happened to have a card already made. The challenge was to use embroidery floss in some way on our project. I had all my elements mostly done, so I decided to add some Spring Moss stitches around the circle frame. 


To make sure all my stitches were nice and even, I punched some holes with a piercing tool using one of those plastic canvas circles. Super simple and I didn't have to worry about even stitches.

This is an unusual color combination for me, but I hardly ever use this bright aqua 'Hawaiian Shores' so I challenged myself to use it. I'm pretty pleased with the way it turned out too, so I have to tell myself not to be afraid to use different colors in the future.

Thanks for hopping by!

New Beginnings

Good morning everyone!
I needed to make a wedding card for someone who loves Dogwoods so I went on a hunt for a digital stamp. That's the awesome thing about digis, you can almost find any image you need and no waiting for the mailman to bring it to you! Just print and color. This gorgeous Dogwood stem is from Stitchy Bear
I like to occasionally color my images with Copics on shimmery paper. It creates a slightly mottled, water color look, and the colors stay a lot lighter than on regular paper. Not to mention the shimmer shows through the Copics because they're transparent. 
I used some white Pearl Linen cardstock from The Paper Temptress for this card. Because it's shimmery, it's easier to emboss the images right from the printer if you act quickly. However, I learned the hard way not to use a textured paper for embossing. A lot of excess EP sticks to the texture and I had to do a lot of cleaning up with a tiny paintbrush before heating it. But it is absolutely gorgeous in real life, and perfect for a wedding card.


The fancy tag was cut out using a thin sheet of silver foil I got from the craft store. It's real metal and looks absolutely rich. Simple and elegant, I think, just like a wedding should be!

Hope you like it, thanks for dropping by!

Stamps: Digital image from Stitchy Bear, sentiment from Papertrey Ink
Ink: Memento
Paper: White Pearl Linen, water color paper, SU
Tools & Accessories: Spellbinders fancy tags, metal foil, SU ribbon, Copics, black embossing powder, Cuttlebug embossing folder

Monday, March 21, 2011

Easter Acetate Treat Box

Hello everyone! Here's another Easter treat idea that I just love. I got the idea from Splitcoast Stamper's resources section here. This box is fairly simple to construct and it looks so cute filled with these speckled egg shaped malted milk chocolates. 

I love making 3D projects, but I really, really wish I had a digital cutter. For the longest time I didn't think I needed one for card making or the few 3D crafts I make, but it suddenly occurred to me a few weeks ago. I have been spending hundreds of dollars on dies of all kinds over the years. Spellbinders labels are my favorites of course, but a close runner up are flowers, fancy curlicues, scalloped shapes...you get the idea. I've been running into these web sites that have cut files, and templates and all sorts of things for digital cutters that are very similar to the metal dies available. If I had just invested in a digital cutter instead of the dies, I could've saved myself a lot of money! Well, now I want one and I think after a lot of research, I've decided on the Gazelle. However, the price tag is a bit steep for my budget. Why am I sharing this? Well, if you have one, or know someone who does and wants to sell a gently used one, PLEASE send me an email! (Right sidebar has the link). I know it's a long shot, but hey, might as well try right?
Now onto my project:


I colored the adorable flying bunny from Lili of the Valley with my colored pencils and cut him out entirely. He was layered onto some patterned paper which was adhered to the GORGEOUS die cut from Marianne Design dies.


It's hard to see in the picture, but I made a cute little tag on the top of the box using Papertrey Ink's Tags for Spring set.

Hope you'll try this project too, it's a lot of fun! Thanks for stopping by!

Stamps: Lili of the Valley, PTI
Ink: Memento, Perfect Match
Paper: Heavenly White, Basic Grey, Neenah
Tools & Accessories: Marianne Designs Creatables die, Nestabilities, colored pencils, OMS, Glaze pen, Scor Pal, PTI ribbon

Friday, March 18, 2011

Hey Chickie!

Good morning everyone! I thought I'd share this completely adorable little Peep box I made for Easter. It's based on this box made a while back by Lisa Johnson. When I started seeing all the pretty colors of all the Peeps, this was the first project that sprang to mind. It's very simple to make, and easy to change up for every season. 


I colored the sweet little hatching chick with some colored pencils, super quick and layered it onto some die cut circles to make a quick tag. The little ribbon ends peeking out from behind it are simply the double ended banner dies from PTI folded in half.

Super easy and super cute!

Thanks for dropping by, have a great Friday!

Stamps: Papertrey Ink
Ink: Memento, Perfect Match Plum Pudding
Paper: PTI
Tools & Accessories: PTI ribbon, Nestabilities, PTI die, EK Success edge punch, Scor Pal, excelsior 

Thursday, March 17, 2011

Impression Obsession Anything But a Card Challenge

Good morning everyone, it's time again for an Impression Obsession challenge. This week we were to create anything but a card. Fun! I love to make 3D projects, but don't do them as often as I'd like. They take up a lot more storage space than cards, lol. I decided to make a sweet little chipboard coaster calendar, perfect for your desk at work.


I used this adorable little Watermelon Bug background stamp by Leigh Hannan. It's so cute! I stamped it in black pigment ink then heat embossed it. I spritzed a little Gimmer Mist all over it for some shimmer. Then I went back and colored it in with some reinkers and an SU marker.

The daisy was created from an SU daisy die out of crepe paper that I also spritzed with Glimmer Mist. So pretty!

To assemble the calendar after I decorated the front and inside of the coaster, I just punched some holes along the top with a Crop-a-dile and threaded some ribbon through both. The calendar was printed from a template I found on Splitcoast Stampers. I cut them all to size, sandwiched them between two pieces of scrap chipboard and applied a thin layer of white glue along the top. After the glue dried, I carefully tore off the top piece of chipboard and adhered the calendar to the inside.
This was a pretty simple project that would make a really cute gift, maybe along with a pretty pen and a notebook.

Now head on over to the other DT's blogs for more inspiration, then create your own project to submit for a chance to win a $25 gift certificate to the IO store.


Thanks for visiting!

Stamps: Impression Obsession H2438
Ink: Versamark, Glimmer Mists
Paper: Coasters, PTI, Stardream, water color paper
Tools & Accessories: Embossing powder, SU marker, Crop-a-dile, ribbon, Tonic corner rounder, SU daisy die, Marvy mini flower punch, rhinestone

Wednesday, March 16, 2011

Lili of the Valley Thursday Sketch Challenge 88

Hello everyone, we have a nice sketch for our challenge from the sketch Queen Bev. LOVE her style! See it on the LOTV blog here. I really went bold with this week's card, strong, vibrant colors. It was a little intimidating for me, but I started noticing that I use a LOT of pastel colors. They are my favorites, but sometimes I need to shake things up a little.


I colored 'Bunny Cupcakes' with my colored pencils. LOTS of layers of color. I usually leave a lot of white, or very light areas with my coloring, but this time I really wanted rich, deep colors. Particularly on the turquoise dress of Mama Bunny.


The papers are from an older K & Company collection called 'Mira'. I am really trying hard to put a serious dent in my stash, but it doesn't seem to be working, lol. Maybe because I need to stop buying MORE, lol. What am I supposed to do when all these different companies keep putting out more and more beautiful papers?! Well, I have to say, I have stopped purchasing new paper collections just because they're from one of my fave companies. I have to really LIKE them. Some of them are just looking like more of the same to me, so I've become more discriminating.

Anyhoo, that's all for now. Zoom on over to the LOTV blog to see all the gorgeousness the other DT ladies have come up with. And don't forget to enter your own card for a chance to win some LOTV cash!

Thanks for peeking in!

Stamps: Lili of the Valley
Ink: Palette, Glimmer Mists
Paper: Heavenly White, K & Co., PTI, crepe paper
Tools & Accessories: Corner rounder, colored pencils, OMS, Liquid Glass, XF Sharpie poster pen, seam binding, McGill circle punch, Bow Easy, pearls, Mini flower punch from The Punch Bunch

Tuesday, March 15, 2011

Fairy Friends

Good morning everyone! Here's another sweet fairy from the elusive Pergamano sets I was so desperately searching for several weeks ago. This one is from the Summer Fairies set. Doesn't she look so sweet sitting on her mushroom having a little chat with her friend Fairy Frog, lol?


As much as I love the Prima Fairy Flora papers {{LOVE}} there are a couple in the collection that are very bright as far as the colors go. This patterned paper is a perfect example. I wanted to use it so much, but it just looked so much more bold and vibrant than I was comfortable with. Then I remembered seeing Mel from Mel Stampz applying a wash of gesso over some patterned paper to tone down the colors a bit, and I knew that was the solution! I didn't use quite as much gesso as she did, just a faint wash to mellow the color a bit. I probably could've lightened it a bit more, but, I was much happier with it. 

I made the crepe paper flower too, a result of playing around with my huge stash of the stuff, lol. I spritzed a piece of white crepe paper with some Glimmer Mists and after it dried I cut a long strip and started pleating it. I wasn't too careful, and it's definitely far from perfect, but I kind of liked it so I stuck it on there. 


Hope you like it, thanks for visiting!

Stamps: Pergamano, Papertrey Ink
Ink: Memento, Perfect Match
Papers: Heavenly White, Prima, SU, PTI, crepe paper
Tools & Accessories: Spellbinders lacy squares, Geo punch, Glimmer Mists, pearl, Stickles, Viva Pearl Pen, Creatables flourish dies, PTI ticket die

Friday, March 11, 2011

Happy Spring

Good morning everyone! I have a cheerful tulip card to share with you all today. I used the beautiful image from PTI's Friendship Jar Spring Fillers set. I love tulips and I tried to color these to resemble the tulip border I used to have years ago. They were pink and creamy pale yellow along the edges. They were so gorgeous in early spring and I miss them!


I used my colored pencils to color these and added a little bit of Stickles to sparkle them up. 


The papers are from a Memory Box collection.

Hope they bring you some cheer on this gloomy rainy day, I guess all this rain we've been having signals spring is coming soon!

Thanks for stopping by!

Stamps: Papertrey Ink
Ink: Memento, Perfect Match
Paper: PTI, Neenah
Tools & Accessories: PTI label die, seam binding, colored pencils, OMS, Stickles

Wednesday, March 9, 2011

Lili of the Valley Thursday Challenge... Say it with flowers

Hello everyone, it's that time of the week again! This week we're saying it with flowers on the LOTV challenge blog. Now unlike everyone else on the card making planet, I actually do not have tons of those gorgeous little flowers to embellish my projects, lol! I do feel like the odd girl out sometimes, but I think I still managed to meet the challenge requirements here. Now if this gorgeous orange blossom doesn't say something to you, I don't know what will! 


I've had this amazing paper pad from SEI for quite a while now, and never used it. I know, what the heck was I waiting for, right?! Well, the colors were a little intimidating to me, I don't use much orange except for Halloween/Autumn. But, the flowers in this collection were so incredible I knew I had to make a card that featured it front and center. I have to tell you, I LOVE the way this card came out! It's a keeper!

I colored the Molly Harrison fairy 'Freedom' with a combo of Copics and colored pencils. I couldn't quite get the orange color I wanted with just Copics, so I used both mediums to get it just right. Let me tell you, it's a lot faster and easier to shade/blend with colored pencils than Copics for me, so I really liked this way of coloring. I cut out an extra set of her wings from vellum, colored on the back and layered them. I had a 'happy accident' when I Stickled them, they started curling and warping a bit. I almost freaked out, but then realized with a few extra glue dots to hold them down a bit better, they actually looked better. They reminded me of drying autumn leaves.
I used some of my new Creatables dies to add some flourishes and the frame on the bottom left. They are simply stunning, love all that swirly lacy stuff! I see a new addiction coming on...

Make sure to check out the LOTV blog for more inspiration, then create your own card and enter it to win a chance at some LOTV bucks. With the new release, you're going to need it!

Thanks for stopping by!

Stamps: Lili of the Valley
Ink: Memento, Distress
Paper: Heavenly White, SEI, SU, PTI, Mirricard reflective cardstock
Tools & Accessories: Copics, colored pencils, OMS, Stickles, Marianne Design Creatables dies, Viva Decor pearl pen, Adirondack dimensional pearls

Tuesday, March 8, 2011

Fairy Garden Exploding Box

Good morning everyone! This is my first attempt at making an exploding box, and although it's not the best example, I figured I'd show it anyway. I plan on making more, improved versions, lol! I really love this idea, and if you've seen these FANTASTIC magic boxes, you'll understand why! 


Here's what it looks like closed up:


And when you take off the lid, you get a magical fairy world open up. The fairies are a Lili of the Valley stamp that I've colored and cut out. I even layered it onto some matching patterned paper before cutting it out, so the back wouldn't look bare. 
To make all the flowers I took a full piece of watercolor paper and spritzed it with assorted colors  of Glimmer Mists. When it all dried I used various punches/dies to cut a bunch of flowers and leaves. They were shaped by using a stylus to emboss the back of each flower/leaf petal. Some of the flowers were then glued to a strip of acetate to make them 'pop' up when the box opened. Genius idea, let me tell you!


The large daisy that the fairies are floating above are one of those dies from Stampin Up. I added yellow seed beads to the centers of all the flowers.

I love these exploding boxes and plan on making more to improve my skills, I hope this first attempt has inspired you to try your own! Thanks for stopping by!

Stamps: Lili of the Valley, Gina K
Ink: Memento, Versamark, Tattered Angels Glimmer Mists
Paper: Heavenly White, Prima, Memory Box, water color paper
Tools & Accessories: Flower punches from The Punch Bunch, Martha Stewart leaf punches, SU daisy die, seed beads, Viva Decor pearl pen, colored pencils, OMS, Stickles, satin ribbon, gold embossing powder, acetate

Saturday, March 5, 2011

Mushroom House

Hello everyone! I have a fun, whimsical card to share with you today using this amazing digital stamp from Make it Crafty. Ever since I was a kid, I've loved fairies, hobbits, gnomes and all things magical. This mushroom house brings me back to all those imaginary worlds I used to read and dream about. 

When I really got serious about card making/paper crafting I was always on the look out for the best quality papers and art tools to really make my cards special. I experimented with a lot of different supplies before I found my favorites that will always be in my permanent stash. Cardstock that was sturdy enough for the 6" x 6" cards I preferred to make was very difficult to find. After much frustration, I decided to email Patricia who own The Paper Temptress if there was any way I could get 12" x 12" heavy duty cardstock from anywhere. Sure enough, she told me about Heavenly White 120 lb. cardstock that she carried in her store already in 8.5 x 11 and could get it in the larger size as well. I decided to try it, and am so glad I did! It is really thick, smooth and perfect for large card bases. I've been a happy customer ever since. She recently asked me to be a guest designer for the month of March to which I gladly said yes, and sent me a wide variety of papers to play with. While admiring all the different textures and specialty effects I came across this Ruche paper and immediately thought about this Mushroom house digi. Sometimes all it takes is a piece of paper to inspire an entire project.


The crinkly texture of the Cocoa Ruche reminded me of tree bark and was perfect for this card. I printed the digital image on Kraft paper and colored it with my colored pencils. I love this look, the colors really 'pop' on the light brown background. I chose the earthy patterns and colors from Cosmo Cricket's Nutmeg paper pad to match the mushroom roof.

Well, I'm off to relax and spend the day stamping and coloring. Thanks for visiting!

Stamps: Digital image from Make it Crafty, Circle sentiment seal from Lili of the Valley
Ink: Memento
Paper: Cocoa Ruche, Core'dinations, PTI
Tools & Accessories: Colored pencils, OMS, Stickles, polka dot ribbon, Nestabilities, Sakura Glaze pen, EK Success edge punch

Friday, March 4, 2011

Vintage Posies

Good morning everyone! I've got a no-coloring card to show you today. I find myself doing these types of cards less and less now a days, but every once in a while I have to take a break from doing the same thing. 
How about that gorgeous lace doily? No, it didn't come from the kitchen department, it's cut from  SU Vanilla paper using a Cheery Lynn doily die. It's gorgeous!


I had a heck of a time trying to do the two-step flower stamping, I finally learned how to use a Stamp-a-ma-Jig properly. I love the vintage effect I get with these though. Reminds me of grandma's curtains, lol!

Well, that's all for now, thanks for visiting me!

Stamps: Stampin Up, PTI sentiment
Ink: Distress, SU, Palette
Paper: SU, PTI
Tools & Accessories: Stickles, wool felt, tiny safety pin, SU jewelry tag/seam binding, Prima lace, Cheery Lynn doily die, Nestabilities, pearls

Thursday, March 3, 2011

The Color Blue....

Good morning everyone, it's time for another Impression Obsession challenge. This week we're using the color blue for our inspiration. Here's what I came up with:


I've always admired brayered backgrounds with black silhouettes for their elegant, simple beauty, so I tried that out. I used Leaf Silhouettes 7 and   for this card,  just stamped in black Memento ink. The moon was masked off with a post it note before I started brayering, then I went back with the negative mask and added the yellow with a sponge dauber.


While I was stamping the leaves I was thinking what kind of patterned paper I should use for the card base. I didn't want anything too busy to distract from the main image, it needed to be simple and subtle. Well, I couldn't think of anything in my stash that would be right, and I didn't feel like digging anyway, lol. I chose to stamp a light blue background with the Music Cover-a-Card. Perfect! Now I could call this card 'Moonlight Sonata', haha!
The sentiment is also from Impression Obsession, 'If you are Grateful'.

Now hop on over to the IO blog to see what's new, then you can check out the rest of the DT's Blue cards for more inspiration.

If you want to play along with our challenge, you can enter to win a $25 gift certificate. You can read all the details on the Impression Obsession blog.

Thanks for visiting!

Stamps: Impression Obsession
Ink: Distress, Adirondack, Memento
Paper: PTI
Tools & Accessories: brayer, silver satin ribbon, Spellbinders Labels, Mega Mount